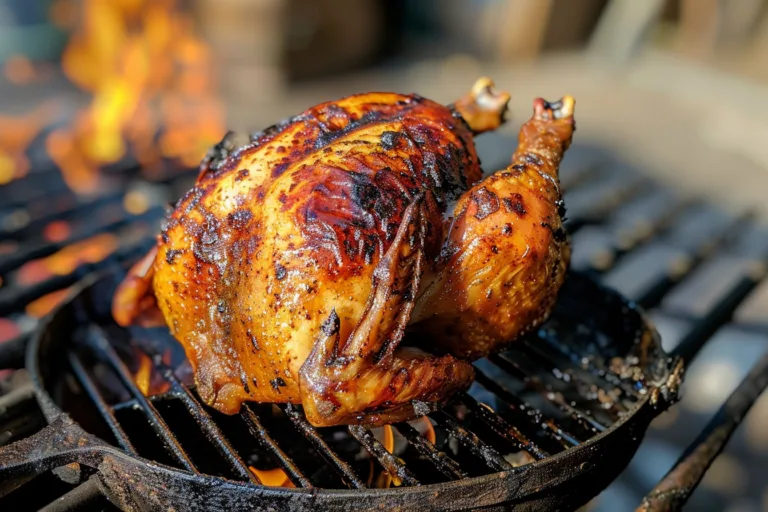
Beer Can Chicken with Crispy Skin is a one-of-a-kind roast method that infuses moisture and bold flavor while achieving perfectly golden skin. This technique involves roasting a whole chicken upright over a can of beer, using the steam to lock in juices while the spices create a crunchy, flavorful exterior.
| Prep Time | 30 minutes |
|---|---|
| Cook Time | 1 hour 25 minutes |
| Total Time | 1 hour 55 minutes |
| Servings | 4 |
| Difficulty | Medium |
| Cuisine | American |
Why This Recipe Works
Beer Can Chicken with Crispy Skin delivers restaurant-quality results at home. The upright roasting method allows even heat distribution, while the beer evaporates slowly to baste the chicken. My first attempt left me stunned by the tender meat and golden skin that crunched with every bite.
The beer’s vapor keeps the bird juicy even when roasted at high heat. I tested this with traditional beer, then switched to non-alcoholic versions to confirm the flavor still shone. The spices cling to the skin better during upright roasting, which simplifies the cooking process while boosting taste.
Ingredients
| Ingredient | Quantity | Notes with Alternatives |
|---|---|---|
| Whole chicken | 4-5 lbs (1.8-2.3 kg) | Ensure giblets are removed. Substitute with chicken thighs if preferred |
| Beer (non-alcoholic or light) | 12 oz (350 ml can) | Choose a can with stable structure. Vegetable broth works similarly |
| Garlic powder | 1 tbsp | Fresh garlic reduces skin crispiness. Use powdered form for best results |
| Paprika (smoked preferred) | 1 tbsp | Adds smoky complexity. Regular paprika or chili powder available |
| Salt | 1 tbsp | Kosher or sea salt ideal. Avoid iodized if using skin substitutes |
Step-by-Step Instructions
Preparing the Chicken
- Rinse chicken under cold water, pat completely dry with paper towels
- Remove excess fat from cavity while being careful not to tear skin
- Slice garlic powder and paprika into seasoning mix with salt for even distribution
- Gently tuck chicken wings under body and secure drumsticks to prevent burning
Assembling the Beer Can Setup
- Pierce non-alcoholic beer can with tines of a chicken trussing fork avoiding leaks
- Insert can into chicken cavity with bottom flat against oven rack
- Stand chicken upright in roasting pan with cavity facing up
- Carefully season cavity with additional spices for depth of flavor
Roasting to Perfection
- Roast at 500°F (260°C) for 15 minutes then reduce to 350°F (175°C)
- Insert meat thermometer into thigh avoiding contact with bone
- Cover loosely with aluminum foil after 40 minutes to prevent over-browning
- Let rest 15-20 minutes before separating chicken from can
Chef Tips for Perfect Results
- Use beer with strong flavor notes – amber or lager varieties give better seasoning adherence than bland options
- Patting skin completely dry after seasoning ensures steam doesn’t form, which is crucial for crispiness
- Place chicken on a rack over can to avoid moisture pooling while allowing vapor to circulate
- Season cavity with fresh herbs like rosemary to complement the beer’s character (optional)
Common Mistakes to Avoid
Overloading cavity with beer causes sogginess. Use only 3/4 full can for proper steam
Under-seasoning results in bland meat. Rub spice mixture under skin for flavor penetration
Skipping initial high-heat roasting phase prevents skin from setting properly
Punching too many holes in can leads to liquid spills damaging skin. Four small tines sufficient
Variations and Substitutions
| Ingredient | Substitution | Impact on Flavor |
|---|---|---|
| Beer | Vegetable broth | Milder aroma but retains moisture. Use low-sodium broth to maintain seasoning balance |
| Paprika | Chili powder | Smoky character becomes spicier. Adjust quantity to avoid overpowering meat |
| Garlic powder | Fresh minced garlic | Loss of skin crispiness but adds raw garlic depth. Mix with olive oil for better coating |
Serving Suggestions and Pairings
Match Beer Can Chicken with classic Southern sides like hush puppies or collard greens. The crisped skin pairs well with acidic slaws
For casual gatherings, serve with cornbread and pickled vegetables. Holiday meals benefit from roasted potatoes or creamy mashed cauliflower
Storage and Reheating
| Method | Duration | Instructions |
|---|---|---|
| Fridge | Up to 3 days | Cool breast to room temperature first. Store in airtight container with parchment |
| Freezer | 2-3 months | Wrap tightly in freezer-safe packaging. Label with cooking date for best quality |
| Reheating | 20-25 minutes | Use oven at 325°F (165°C) with minimal moisture to restore skin crispiness |
Nutritional Information
| Nutrient | Amount per Serving |
|---|---|
| Calories | 450 kcal |
| Protein | 48 g |
| Fat | 22 g |
| Carbohydrates | 2 g |
| Fiber | 0 g |
| Sugar | 1 g |
| Sodium | 600 mg |
Includes “Approximate values.”
Frequently Asked Questions
Can I substitute non-alcoholic beer for regular beer?
Yes. Non-alcoholic beer gives same moisture and flavor benefits without alcohol content. Choose full-bodied variety for richest taste
How to know when chicken is done?
Use a meat thermometer – internal temperature must reach 165°F (74°C) in thickest part. Skin will shrink and pull away slightly from bones
Why isn’t my chicken skin crispy?
Excess moisture in cavity causes steaming instead of roasting. Ensure can is sealed and chicken is completely dry before seasoning
Can I prepare this make-ahead?
Marinate for 1 hour max since skin absorbs liquid. Alternatively pre-truss but roast within same day for best texture
What sides complement Beer Can Chicken?
Pair with roasted root vegetables and lemon wedges. Avoid soggy starches like rice that contradict skin’s crispness
Conclusion
Beer Can Chicken with Crispy Skin transforms ordinary roasting into a flavorful masterpiece. By balancing moisture and heat, this technique guarantees juicy meat with restaurant-worthy crunch. Master the upright method and you’ll discover why beer-basted chicken remains a kitchen favorite – the beer enhances depth while the spices give skin its signature crackle
Print
Beer Can Chicken with Crispy Skin
- Prep Time: 30
- Cook Time: 85
- Total Time: 115
- Yield: 4 servings 1x
- Category: General
- Method: Roasting
- Cuisine: American
Description
Juicy beer-canned chicken with golden, crackling skin. The upright roasting method uses steam from a non-alcoholic beer to lock in moisture while spices create a bold, crispy exterior.
Ingredients
4–5 lbs whole chicken
12 oz non-alcoholic beer or vegetable broth
1 tbsp garlic powder
1 tbsp paprika (smoked preferred)
1 tbsp salt (kosher or sea salt)
Instructions
Rinse chicken under cold water and pat dry with paper towels
Remove excess fat from cavity without tearing skin
Mix garlic powder, paprika, and salt in a small bowl
Gently tuck chicken wings under body and secure drumsticks with kitchen twine
Pierce non-alcoholic beer can with a chicken trussing fork
Insert beer can into chicken cavity, ensuring bottom rests flat against oven rack
Stand chicken upright in a roasting pan with cavity facing upward
Season cavity with an additional ½ tbsp salt
Place in preheated 425°F (220°C) oven and roast for 1 hour 25 minutes
Baste chicken with pan juices during the final 15-20 minutes of cooking
Let rest for 10 minutes before serving
Notes
Use chicken thighs instead of whole chicken for a simpler alternative
Vegetable broth can replace the beer can for a non-carb version
Ensure skin is fully dried before seasoning to maximize crispiness
For extra flavor, add rosemary or thyme sprigs to the cavity
Nutrition
- Serving Size: 1 chicken portion
- Calories: 600
- Sugar: 0g
- Sodium: 575mg
- Fat: 35g
- Saturated Fat: 10g
- Carbohydrates: 2g
- Fiber: 0g
- Protein: 60g
- Cholesterol: 200mg